Lighting is one of the most important elements in food photography—and one of the least talked about when you’re just getting started. It shapes the tone of the image, directs the viewer’s eye, and affects everything from texture to color accuracy. Whether you’re aiming for moody and dramatic or light and airy, understanding the difference between natural and artificial lighting will help you make creative, consistent choices across your shoots.
In this post, we’ll explore how to work with both types of light, what tools you’ll need to shape it, and how to source budget-friendly gear using cashback options that make your photography setup more affordable.
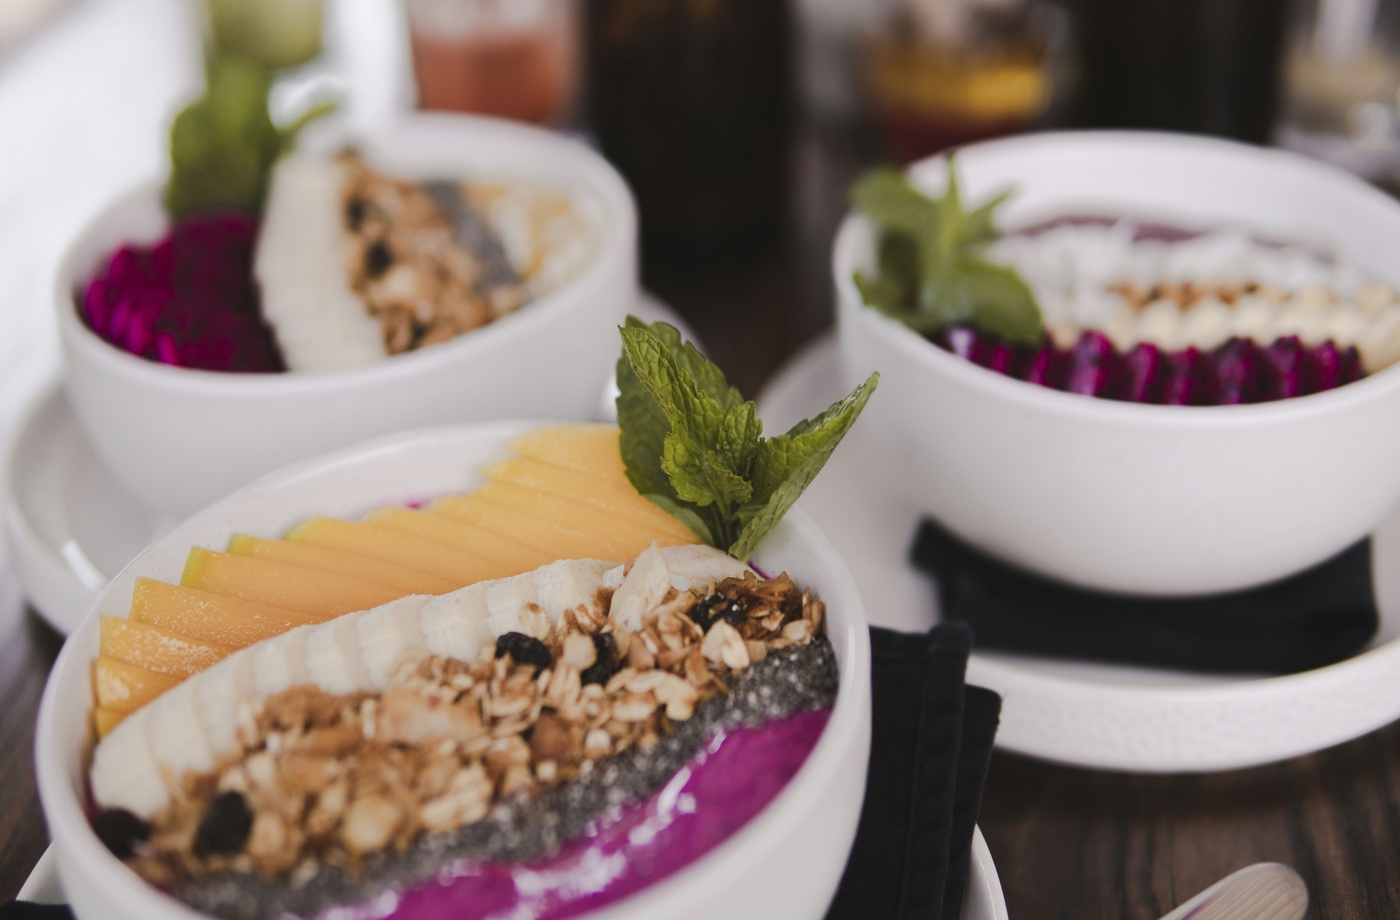
Natural Light: Soft, Organic, and Ever-Changing
Why use it:
Natural light is ideal for its softness, color accuracy, and ease of use. Window light offers gentle transitions between highlights and shadows, making food look inviting and real.
Best conditions:
- North-facing windows (consistent, cool light throughout the day)
- Overcast days for soft, diffused shadows
- Early morning or late afternoon for golden, angled light
Tips for working with natural light:
- Use a white foam board to bounce light onto the darker side of your dish.
- Block unwanted spill from other windows with a black card to control contrast.
- Use sheer curtains or a diffuser panel to soften harsh sunlight.
If you’re styling in a space without great windows, you can create faux daylight by combining artificial tools with the same principles (more on that below).
Artificial Light: Controlled, Consistent, and Customizable
Why use it:
Artificial lighting is perfect for night shoots, overcast days, or when you want complete control. It allows consistency across multiple sessions and gives you freedom to shoot anytime.
Common setups include:
- Continuous LED panels (like Neewer) for soft lighting control
- Strobe lights for studio-level sharpness and freezing motion
- Diffusers and softboxes to soften the intensity of the light
- Reflectors and flags to bounce or block light strategically
If you’re starting to build your toolkit, you can find excellent starter kits on Amazon or B&H Photo. I recommend checking Rakuten for cashback before purchasing from major online retailers, and using discounted Amazon gift cards through Fluz to bring down the cost of gear.
Comparing the Two: Which Should You Use?
| Criteria | Natural Light | Artificial Light |
| Cost | Free | Requires investment in gear |
| Learning Curve | Beginner-friendly | More technical, but very precise |
| Flexibility | Daylight hours only | Anytime, any place |
| Consistency | Can vary with time of day/weather | Repeatable and fully controllable |
| Aesthetic | Organic and soft | Dramatic, crisp, or moody depending on setup |
Hybrid Approach: The Best of Both Worlds
Many food photographers use both depending on the shoot. For example, natural light might be best for a rustic breakfast scene, while a moody dessert plate could benefit from artificial light’s control and drama.
When using artificial light to mimic daylight:
- Use a daylight-balanced LED (5000–5600K)
- Position the light at a 45-degree angle from your subject
- Diffuse the light with a softbox or sheer curtain to avoid harsh highlights
And when styling in natural light, keep a portable reflector and foam board kit handy for small adjustments.
Where to Shop with Cashback Options
Photography equipment can be expensive, but using cashback tools helps you build your kit sustainably.
- Fluz: Buy discounted Amazon gift cards or gear from Home Depot (for backdrops, tiles, foam boards, and DIY modifiers).
- Rakuten: Earn cashback from retailers like B&H Photo, Walmart, and others that sell photography lighting.
- Amazon: Combine Fluz savings and available promotions for lighting kits, tripods, and softboxes.
Using cashback won’t change your gear selection—it just quietly makes your creative investment more efficient.
Final Thoughts
Whether you’re shooting with daylight by your kitchen window or crafting dramatic studio light in your dining room, understanding how light behaves is key to great food photography. Both natural and artificial light have their place—and when used intentionally, either can create compelling, story-driven visuals.
Experiment with both styles. Observe how they change the mood of your images. And most importantly, make the tools work for you—not the other way around.